Author: Er. Deepak Sharda

  • WhatsApp Business Tutorial  — Complete Guide to Set Up, Automate, and Grow Your Business

    WhatsApp Business is the easiest way for small and medium businesses to connect with customers, automate responses, showcase products, and run simple marketing — all from a mobile phone. This guide walks you through each essential feature, from setting up your profile to catalogues, automated messages, broadcasts, website integration, QR links, and data backup.

    📱 What is WhatsApp Business and why use it?

    WhatsApp Business is a dedicated app built for businesses to communicate with customers more professionally than the regular WhatsApp Messenger. It adds features such as business profiles, catalogs, quick replies, labels, and analytics that help you present information, respond faster, and increase customer engagement.

    Key benefits:

    • Create a business profile with address, website, and description.
    • Share a catalog of products and services directly in chats.
    • Automate greetings and away messages to manage expectations.
    • Use labels and broadcasts to organise and reach customers.

    ⚙️ How to set up WhatsApp Business (step-by-step)

    Download the WhatsApp Business app from the Play Store or App Store, verify your business number with OTP, and create your business profile. Add a logo, short description, business category, email, and website so customers see complete details when they open your profile.

    Tips during setup:

    • Use your business name (not a personal name) for the profile.
    • Choose the correct category and add a 2–3 line description.
    • Enable the catalog later to showcase products or services.

    Key benefits:

    • Create a business profile with address, website, and description.
    • Share a catalog of products and services directly in chats.
    • Automate greetings and away messages to manage expectations.
    • Use labels and broadcasts to organise and reach customers.

    🧩 WhatsappBusiness API — when to upgrade

    For one- or two-person businesses, the app is enough. When your business grows and needs multiple agents, chatbots, analytics, and large-scale messaging, consider WhatsApp Business API. API access requires a WhatsApp Business Provider (a dashboard provider) and usually involves costs depending on message volumes and provider pricing.

    Use the app for up to two linked devices. Choose API when you need multi-agent handling, automated chatbots, and detailed analytics for large customer databases.

    🛍️ Create and manage your catalogue 😃

    Catalogues let you list products or services directly inside WhatsApp Business. Each item can include images, name, price, description, product code, and a link to your order form or product page.

    How to add items:

    1. Open Business Tools > Catalogue > Add Item.
    2. Upload images, enter item name, price, and description.
    3. Include an external link if you accept orders on your website.

    ✉️ Automate messages: Away and Greeting messages 😊

    Automated messages help set customer expectations. Use away messages when you are offline and greeting messages to welcome first-time inquiries.

    You can schedule these messages to run always or only during specific hours. Set office hours in your business profile so automatic messages match your working times.

    ⌨️ Quick replies — reply fast with templates 🚀

    Quick replies save repetitive typing. Create common responses (delivery charges, return policy, working hours) and insert them in chat with a short keyword.

    Best practice:

    • Create quick replies for FAQs: pricing, delivery time, returns, and warranty.
    • Use attachments in quick replies to send images, PDFs, or product links.

    📣 Broadcasts and marketing lists 💬

    Broadcast lists let you send the same message to many contacts at once while delivering it as an individual chat. Recipients do not see each other, and replies come back privately.

    Notes:

    • Each broadcast can include up to 256 contacts.
    • Only contacts who have your number saved will receive the broadcast.
    • Use labels to segment contacts and create targeted broadcast lists.

    🌐 Add WhatsApp to your website (WordPress) 🛠️

    Make it easy for website visitors to message you by adding a WhatsApp chat button. On WordPress, install a plugin such as Click to Chat, enter your business number and choose style and position.

    The button opens WhatsApp or WhatsApp Web with a prefilled message. Show or hide the button on specific pages and change its pixel position or size from the plugin settings.

    🔗 Short link and QR code for instant contact 📷

    Generate a short link and QR code inside Business Tools. Place the link in social media bios and the QR code on banners, flyers, or shop windows so customers can tap or scan to start a chat.

    You can also prefill the chat box with a message such as Hello, I am interested in your marketing course so customers only need to press send.

    🏷️ Labels — organise chats for faster follow-up 🔖

    Labels let you tag chats (New Customer, Pending Payment, Interested, Order Complete) and filter or broadcast based on labels. Labels make customer management efficient without an external CRM.

    Create custom labels for your workflow and use colours to spot priorities at a glance.

    🔒 Privacy: Hide last seen, online, and read receipts 🙈

    You can hide Last Seen and Online status under Settings > Privacy. Turn off Read Receipts to prevent blue ticks from showing when you read messages. Note that read receipts still show in group chats.

    💾 Backup and restore your Business WhatsApp data ☁️

    Back up chats and media to Google Drive (Android) or iCloud (iPhone) from Settings > Chats > Chat backup. Link your cloud account, choose frequency (daily, weekly), and enable videos if needed. Restoring is automatic when you register the same number on a new device and allow restoring from the cloud.

    Always schedule regular backups to avoid losing client chats, labels, and catalog details.

    ❓ Frequently Asked Questions

    Do I need to pay to use WhatsApp Business?

    The WhatsApp Business app is free. Upgrading to the WhatsApp Business API for enterprise features and multi-agent support often involves costs through a Business Provider, which vary by provider and volume.

    Can I use WhatsApp Business on desktop?

    Yes. WhatsApp Business supports desktop via WhatsApp Web and linked devices. The app allows up to two linked devices for messaging; the API supports more extensive multi-agent setups.

    How many contacts can I add to a broadcast list?

    A single broadcast list can include up to 256 contacts. For larger audiences, create multiple broadcast lists and segment by labels.

    Will hiding read receipts affect groups?

    Read receipts are turned off for individual chats, but group chats still show read receipts to group members. You cannot disable read receipts for groups.

    How do I recover chats after changing phones?

    When you register the same phone number on the new device and sign in, WhatsApp will prompt you to restore from your cloud backup (Google Drive or iCloud). Ensure you have an up-to-date cloud backup before switching devices.

    ✅ Final tips to get the most from WhatsApp Business

    • Complete your business profile — customers trust a full profile with address and website.
    • Use catalogs and quick replies to speed up sales and reduce friction.
    • Segment with labels and use targeted broadcasts rather than blasting all contacts.
    • Back up frequently and enable scheduled backups to the cloud.

    Implement these steps, and WhatsApp Business will become a powerful, low-cost communication and sales channel for your business.

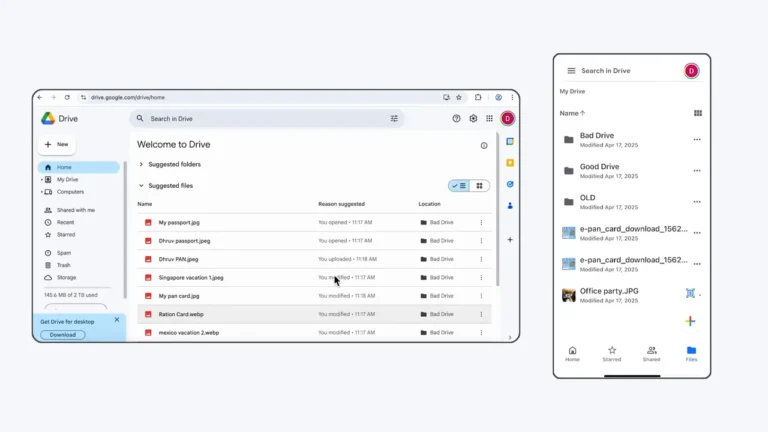
  • Google Drive Tutorial for Beginners – Google Drive App Kaise Use Kare? Laptop & Mobile

    Google Drive Tutorial for Beginners – Google Drive App Kaise Use Kare? Laptop & Mobile

    📥 Google Drive क्या है और क्यों जरूरी है

    आप अपना पर्सनल डाटा मैनेज कर रहे हों या किसी कॉर्पोरेट में जॉब कर रहे हों, आजकल फाइलें कंप्यूटर पर रखना कम और क्लाउड पर रखना ज्यादा होता जा रहा है। Google Drive एक ऐसा टूल है जिससे आप अपनी फाइल्स, फोटोस और डॉक्यूमेंट्स इंटरनेट पर स्टोर करके “एक बटन दबाकर” दुनिया में किसी को भी एक्सेस दे सकते हैं।

    कुछ बेसिक बातें जो जाननी चाहिए:

    • Google अकाउंट के साथ आपको 15 GB फ्री स्पेस मिलता है जो Gmail, Photos और Drive मिलकर यूज करते हैं।
    • किसी भी डिवाइस से (लैपटॉप, मोबाइल, किसी दूसरे कंप्यूटर) वही ईमेल आईडी लॉगिन करके फाइल्स एक्सेस कर सकते हैं।

    📱 मोबाइल पर Google Drive सेटअप कैसे करें

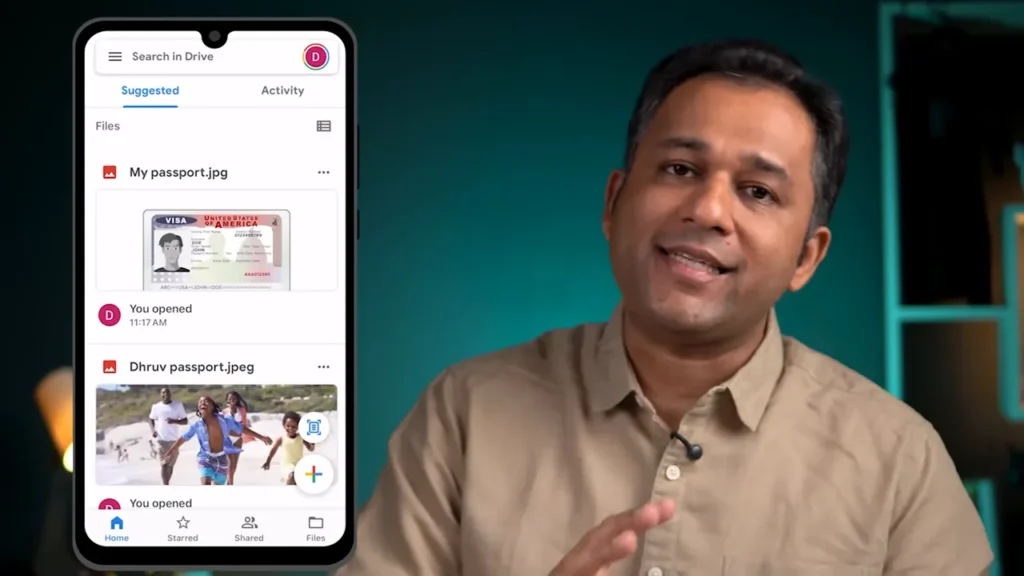
    Android पर Play Store और iPhone पर App Store से “Google Drive” ऐप डाउनलोड करें। उसी Gmail आईडी से लॉगिन करें जिसमें आपका डेटा है। लॉगिन के बाद ऐप में आपको Home और Files (या My Drive) जैसे टैब दिखेंगे।

    लिस्ट व्यू या ग्रिड (आइकन) व्यू चुनना आप ऊपर के बटन से बदल सकते हैं। मैं खुद लिस्ट व्यू प्रेफर करता हूं क्योंकि फाइलें पढ़ने में आसान रहती हैं।

    🗂️ डेस्कटॉप और मोबाइल पर फाइल्स ऐड करना

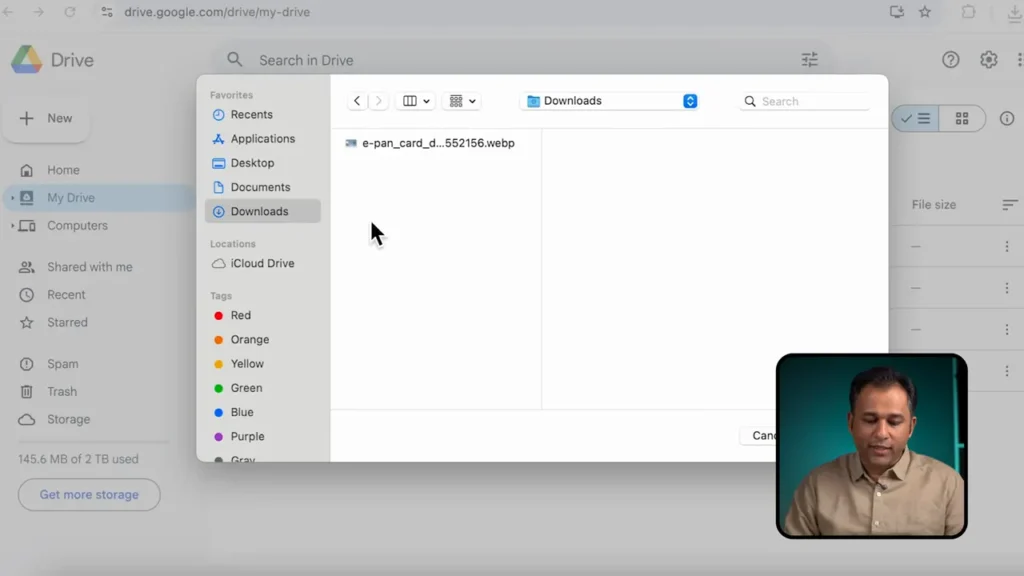
    डेस्कटॉप पर सबसे आसान तरीका है किसी भी फाइल को सीधे ड्रैग और ड्रॉप करके Drive में छोड़ देना। या फिर New → File upload से भी कर सकते हैं।

    मोबाइल पर + बटन दबाकर Upload फ़ाइल चुनें और फोन के फ़ाइल सिस्टम या Photos से अपलोड करें। अपलोड होते ही दूसरी डिवाइसेज पर फाइल दिखाई देने लगती है।

    लिस्ट व्यू या ग्रिड (आइकन) व्यू चुनना आप ऊपर के बटन से बदल सकते हैं। मैं खुद लिस्ट व्यू प्रेफर करता हूं क्योंकि फाइलें पढ़ने में आसान रहती हैं।

    ✏️ फाइल का नाम बदलना, डाउनलोड और डिलीट करना

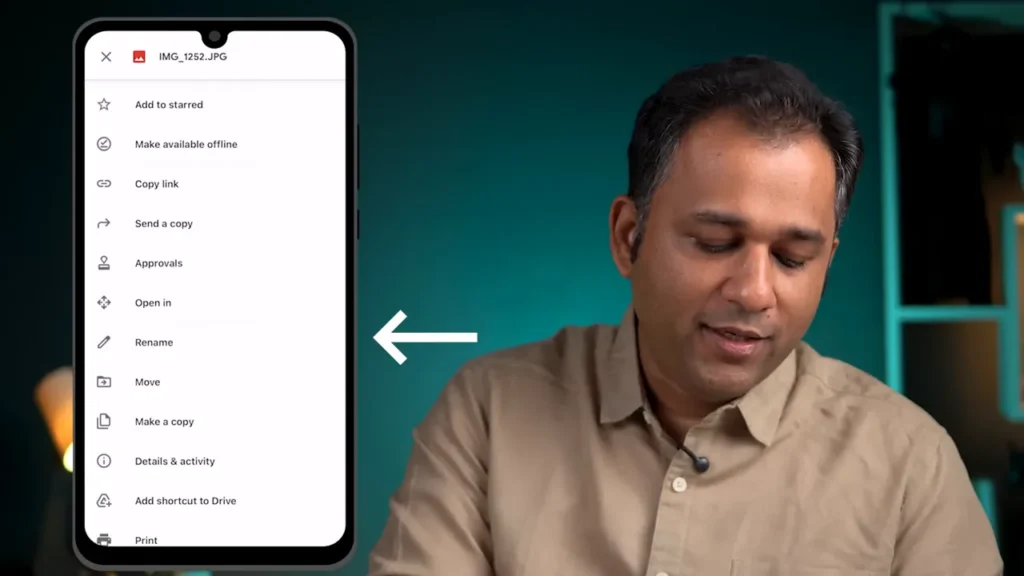
    अगर फाइल का नाम बदलना है तो मोबाइल पर फाइल सेलेक्ट करके तीन डॉट्स में Rename चुनें। डेस्कटॉप पर फाइल पर राइट क्लिक कर Rename।

    किसी फाइल को अपने कंप्यूटर पर डाउनलोड करने के लिए राइट क्लिक → Download। डिलीट करने के लिए Move to trash या Remove (mobile) का उपयोग करें। ट्रैश से पूरी तरह डिलीट करने पर ही स्टोरेज फ्री होगा।

    📄 मोबाइल से डॉक्यूमेंट स्कैन करना

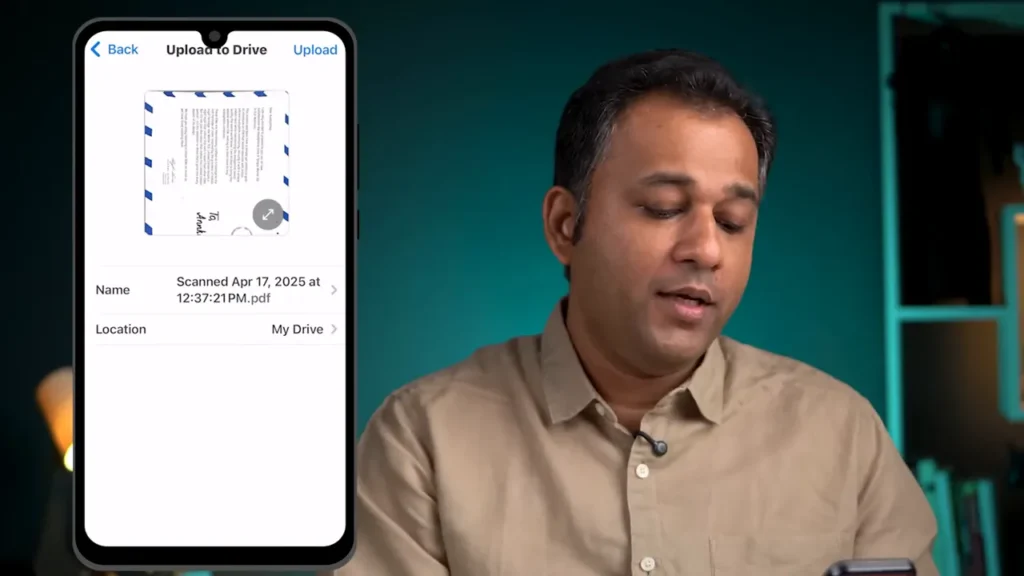
    Drive ऐप में + बटन के ऊपर एक Scan आइकॉन होता है। उसे दबाकर आप किसी पोस्टकार्ड, पैन कार्ड या किसी पेपर को स्कैन कर सकते हैं और सीधे PDF में Drive में सेव कर सकते हैं। मल्टीपल पेज भी एक साथ स्कैन कर सकते हैं। मेरे पास राघव की भेजी पोस्टकार्ड को मैंने स्कैन करके सेव किया था—यह बहुत उपयोगी फीचर है।

    मोबाइल से डॉक्यूमेंट स्कैन करना

    🧹 Bad Drive vs Good Drive — Organize कैसे करें

    यदि आप हजारों फाइल्स बिना स्ट्रक्चर के डाल देंगे तो बाद में बहुत मुश्किल होगी।

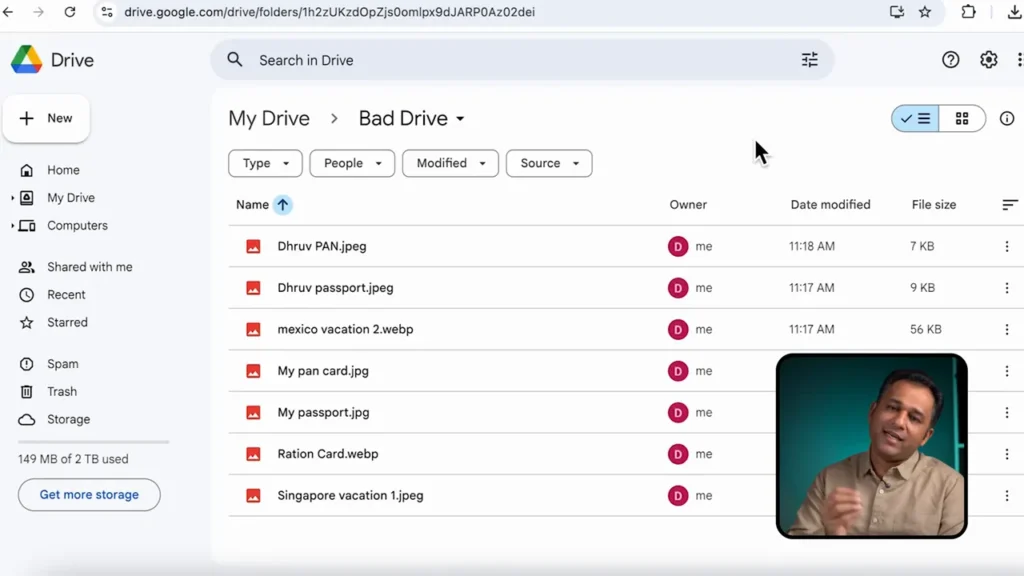
    Bad Drive: सारे डॉक्यूमेंट्स एक ही जगह—पासपोर्ट, राशन कार्ड, मेडिकल रिपोर्ट सब मिला के।

    Good Drive: फ़ोल्डर्स में अलग-अलग कैटेगरीज—Accounting & Finance, Family Documents, Medical Records, Personal Documents, Resumes, Visa & Travel आदि।

    Bad Drive vs Good Drive — Organize कैसे क

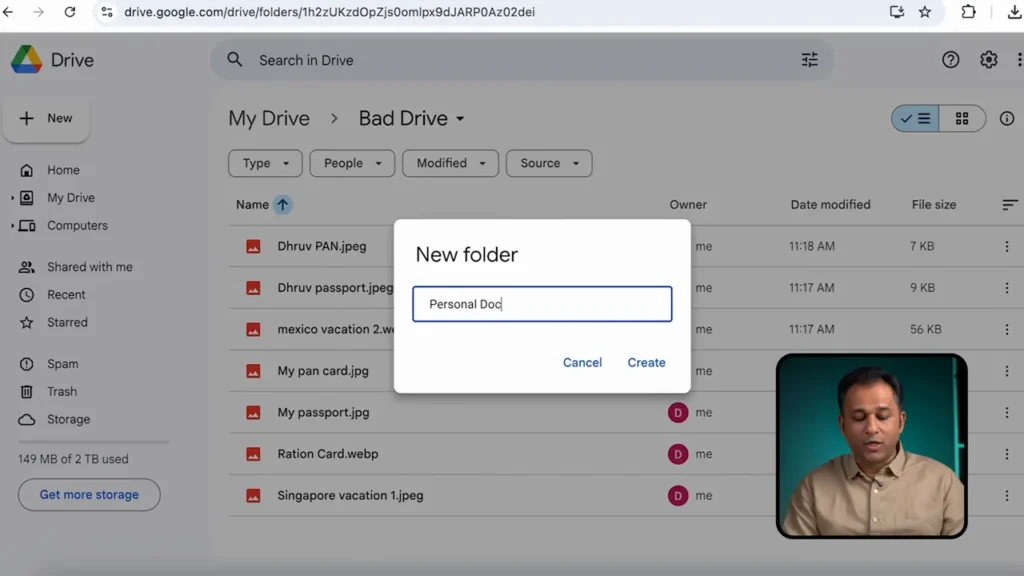
    अच्छा तरीका: नई फोल्डर बनाएं (Right click → New folder), फिर फाइल्स को ड्रैग और ड्रॉप करके या Move विकल्प से सही जगह भेजें।

    Bad Drive vs Good Drive — Organize कैसे क 1

    🔎 फाइल सर्च और सॉर्टिंग के टिप्स

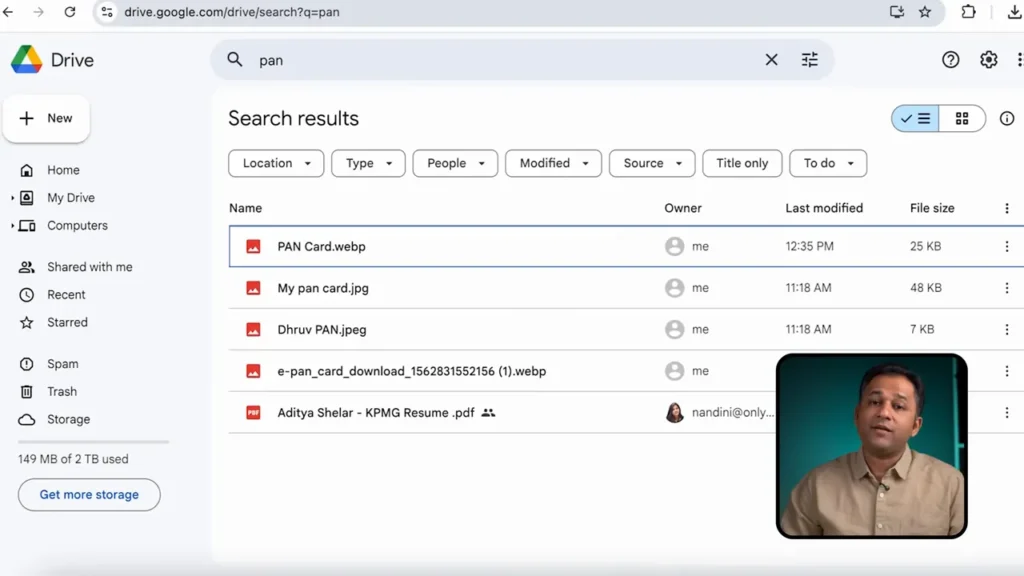
    ऊपर सर्च बॉक्स में किसी कीवर्ड (जैसे ‘पैन’) टाइप करें। सर्च में आप Location (Shared with me, My Drive), Modified date और Title only जैसे फ़िल्टर्स लगा सकते हैं। अगर Title only चुनते हैं तो केवल फाइल नाम में मौजूद शब्द दिखेंगे।

    Modified filter से आप देख सकते हैं कि किस फाइल में पिछले 7 दिनों या 30 दिनों में बदलाव हुआ है—यह खासकर कोलैबोरेशन के लिए उपयोगी है।

    🔗 शेयरिंग और एक्सेस पर ध्यान देने योग्य बातें

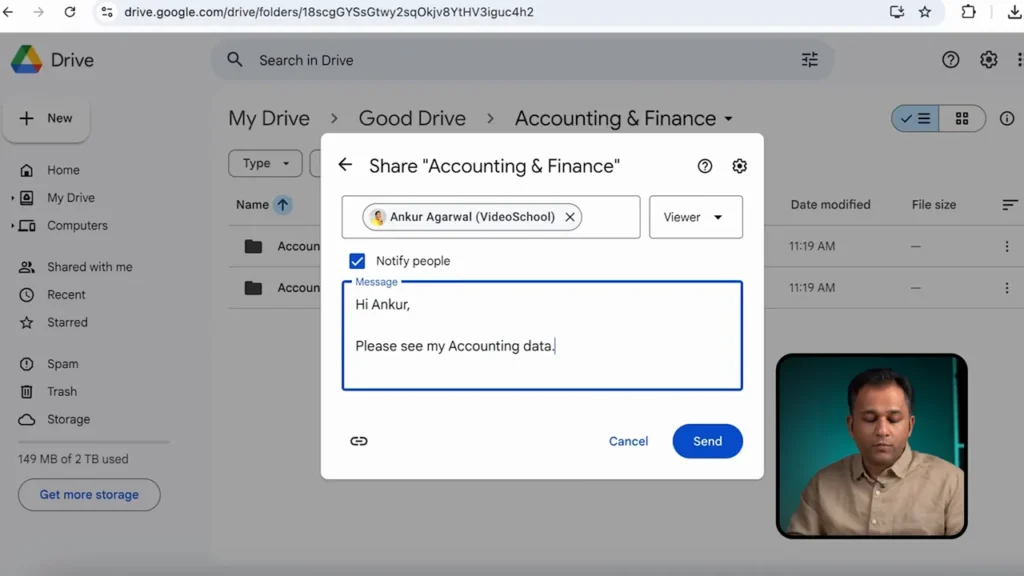
    Folder या file को आप सटीक email ID डालकर शेयर कर सकते हैं और Access level चुन सकते हैं:

    • Viewer — सिर्फ देखने की अनुमति
    • Commenter — केवल कमेंट कर सकता है (अक्सर Google Docs में उपयोगी)
    • Editor — फाइल जोड़ें, हटाएं, और एडिट कर सकता है

    जब आप एक पूरा फोल्डर शेयर करते हैं तो उस फोल्डर के अंदर जो भी फाइलें अभी हैं और भविष्य में जो आप डालेंगे, सब ऑटोमैटिकली सामने वाले के साथ शेयर हो जाएंगी। इसलिए अकाउंटिंग जैसी सेंसिटिव फोल्डर शेयर करते समय सावधानी बरतें।

    शेयरिंग और एक्सेस पर ध्यान देने योग्य बातें

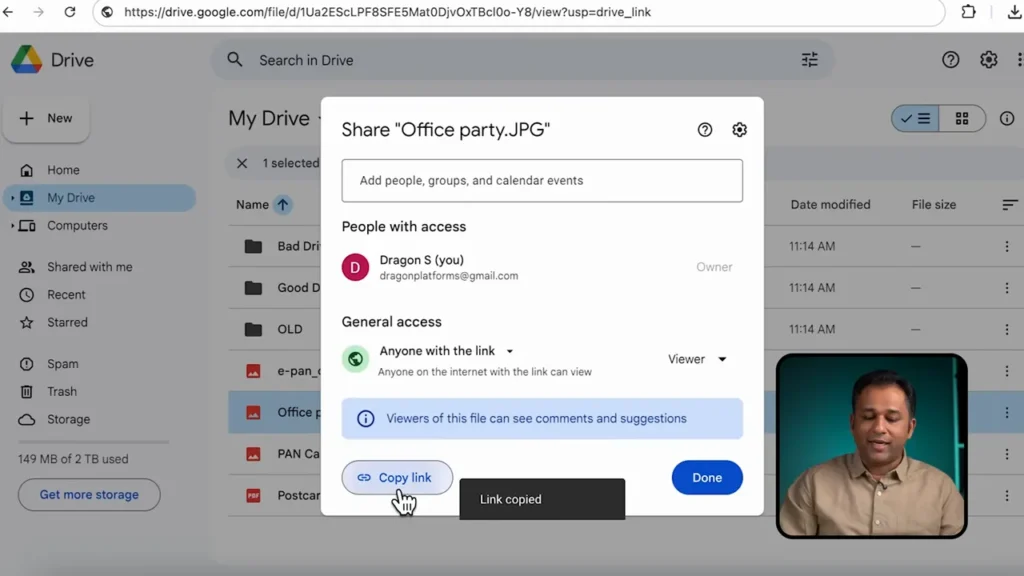
    ⚠️ Anyone with link की खतरनाक बातें और Best Practices

    Share → Change General Access → Anyone with the link कर देने से इंटरनेट पर जो भी लिंक रखेगा वह फाइल देख सकता है। यह सुविधा पोर्टफोलियो जैसे सार्वजनिक कंटेंट के लिए उपयोगी है, पर कॉन्फिडेंशियल डॉक्यूमेंट के लिए खतरनाक है क्योंकि लिंक फॉरवर्ड हो सकता है।

    Recommendation: Unless जरूरी हो, Access को Restricted रखें और जिनको एक्सेस देना है उनके email IDs से Specific permission दें।

    Anyone with link की खतरनाक बातें और Best Practices

    📂 कंपनी एनवायरनमेंट के लिए शेयरिंग नुस्खे

    यदि आप रिज्यूमे भेज रहे हैं या किसी कंपनी को बही-बजट भेज रहे हैं, तो Google Drive लिंक शेयर करने के बजाय PDF attach करना बेहतर होता है—कई कंपनियों के नेटवर्क पर Drive बैन हो सकता है या HR Google Drive पर नहीं देख पाएंगे।

    पर यदि आप चाहते हैं कि दूसरे लोग एडिट या कमेंट करें, तब Drive link शेयर करना सही है।

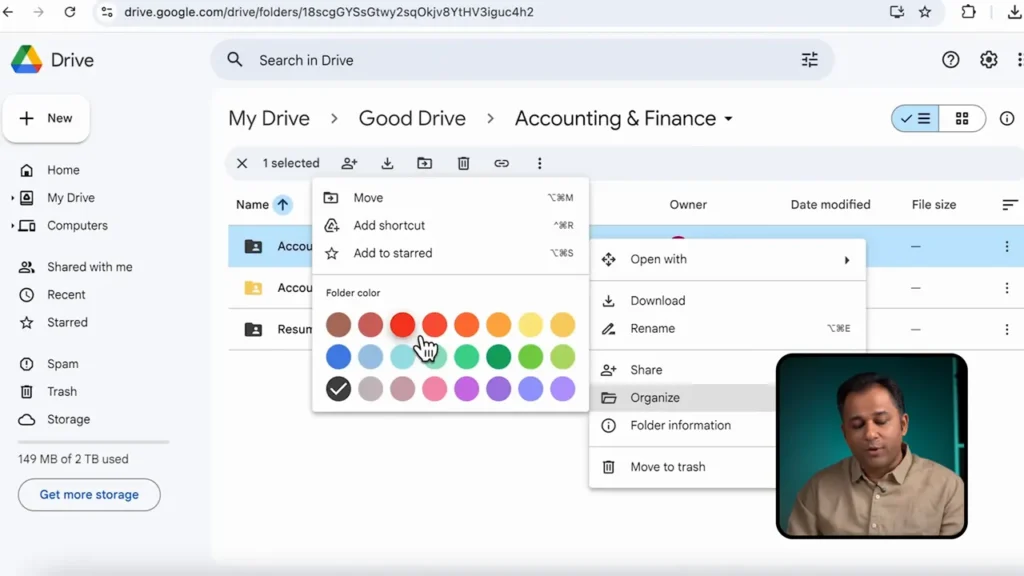
    🎨 फ़ोल्डर्स को कलर-कोड और स्टार करना

    Folder पर राइट क्लिक → Organize → Color बदलकर आप विजुअल तरीके से मैनेज कर सकते हैं। पुरानी फाइलें रेड करके और Active फोल्डर YELLOW करके आसानी से पहचान बनती है।

    Important फोल्डर्स या फाइल्स को “Add to Star” करके Quick access में रख सकते हैं।

    Recommendation: Unless जरूरी हो, Access को Restricted रखें और जिनको एक्सेस देना है उनके email IDs से Specific permission दें।

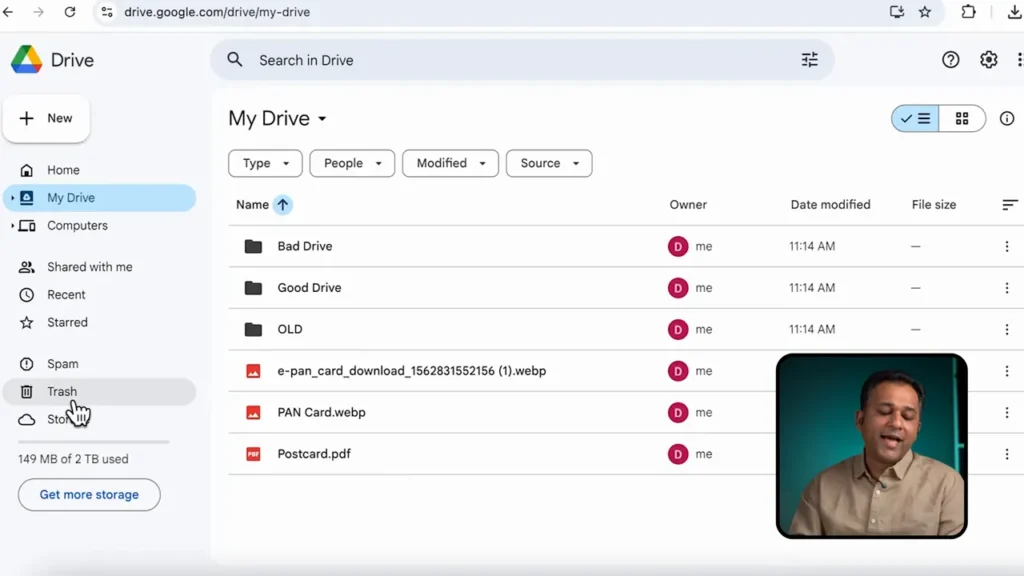
    🗄️ स्टोरेज मैनेजमेंट और स्पेस फ्री करना

    अगर Drive का स्टोरेज भरने लगे तो बड़े फाइल्स खोजकर या पुराने आउटडेटेड फाइल्स को डिलीट करके स्पेस खाली करें। फाइल्स डिलीट करने के बाद Trash में जाकर Permanently delete करना न भूलें — तभी ही स्टोरेज फ्री होगा।

    स्टोरेज मैनेजमेंट और स्पेस फ्री करना

    FAQ

    Google Drive पर फाइल कैसे अपलोड करूं?

    डेस्कटॉप पर फाइल को ड्रैग और ड्रॉप कर दें या New → File upload से फाइल चुनें। मोबाइल पर + बटन → Upload → फोटो या फ़ाइल सिस्टम से चुन कर अपलोड करें।

    किसे Editor और Viewer एक्सेस देना चाहिए?

    अगर सामने वाला फाइलों में बदलाव कर सके, नई फाइल डाल सके या डिलीट कर सके तो Editor दें। केवल देखने के लिए Viewer दें। बाहरी पक्षों को Viewer दें जब आप नहीं चाहते कि वे बदलाव करें।

    Anyone with link कब इस्तेमाल करना चाहिए?

    सार्वजनिक सामग्री जैसे पोर्टफोलियो या कोर्स-संबंधी एक्सरसाइज़ फाइल्स में उपयोगी है। कॉन्फिडेंशियल या सेंसिटिव डॉक्यूमेंट के लिए उपयोग न करें क्योंकि लिंक कहीं भी फॉरवर्ड हो सकता है।

    मेरा रिज्यूमे भेजना है तो लिंक दें या PDF अटैच करें?

    जब आप बाहरी जॉब के लिए रिज्यूमे भेज रहे हों तो PDF attach करें। कुछ नियोक्ता Google Drive लिंक नहीं खोल पाते या Drive बैन होता है, इसलिए PDF सुरक्षित विकल्प है।

    Drive में डॉक्यूमेंट कैसे स्कैन करूं?

    मोबाइल ऐप में + → Scan आइकॉन से डॉक्यूमेंट का फोटो लेकर उसे PDF के रूप में Save कर दें। आप मल्टीपल पेज भी स्कैन कर सकते हैं।

    ✅ आखिरी सुझाव और रीकैप

    Google Drive सीखना आज के समय में बहुत जरूरी है। बेसिक चीजें जैसे अपलोड, रीनाम, डाउनलोड, फोल्डर ऑर्गेनाइजेशन, शेयरिंग परमिशन्स और Anyone with link के खतरे समझकर आप बहुत प्रभावी तरीके से काम कर पाएंगे।

    अगर आप चाहें तो Google Docs, Sheets के एक छोटा कोर्स भी कर सकते हैं जिससे कोलैबोरेशन आसान हो जाएगी। स्टोरेज मैनेजमेंट पर अलग वीडियो में मैं बड़े फाइल्स और स्पेस फ्री करने के टिप्स दूंगा—यदि चाहें तो कमेंट में बताइए, मैं लिंक शेयर कर दूंगा।

  • Paytm Account Kaise Banaye 2025 | How to Create a Paytm Account

    Paytm Account Kaise Banaye 2025 | How to Create a Paytm Account

    दोस्तों, इस गाइड में आप सीखेंगे कि Paytm पर नया अकाउंट कैसे बनाना है, अपने बैंक खाते को UPI से कैसे लिंक करना है, QR कोड से पेमेंट कैसे भेजना है। यह सरल, स्टेप-बाय-स्टेप निर्देश हैं जिनको फॉलो करके आप तुरंत ट्रांजेक्शन शुरू कर सकते हैं।

    Paytm Account बनाना — स्टेप बाय स्टेप

    नोट: नीचे दिए गए स्टेप्स में मोबाइल नंबर और पहचान की वैधता जरूरी है। अगर आपका मोबाइल नंबर उसी फोन पर है तो कई चीजें ऑटोमेटिक वेरीफाई हो जाती हैं।

    1. एप खोलें और मोबाइल नंबर डालें
    अपना मोबाइल नंबर डालें। अगर वही नंबर उसी फोन पर है तो Paytm कई बार ऑटोमैटिक वेरीफाई कर देता है और इंटरफेस खुल जाता है।

    एप खोलें और मोबाइल नंबर डालें

    2. बेसिक प्रोफ़ाइल भरें
    नाम और अन्य जरूरत की जानकारियाँ भरें। आप चाहें तो कुछ स्टेप्स स्किप कर भी सकते हैं और बाद में पूरा कर सकते हैं।

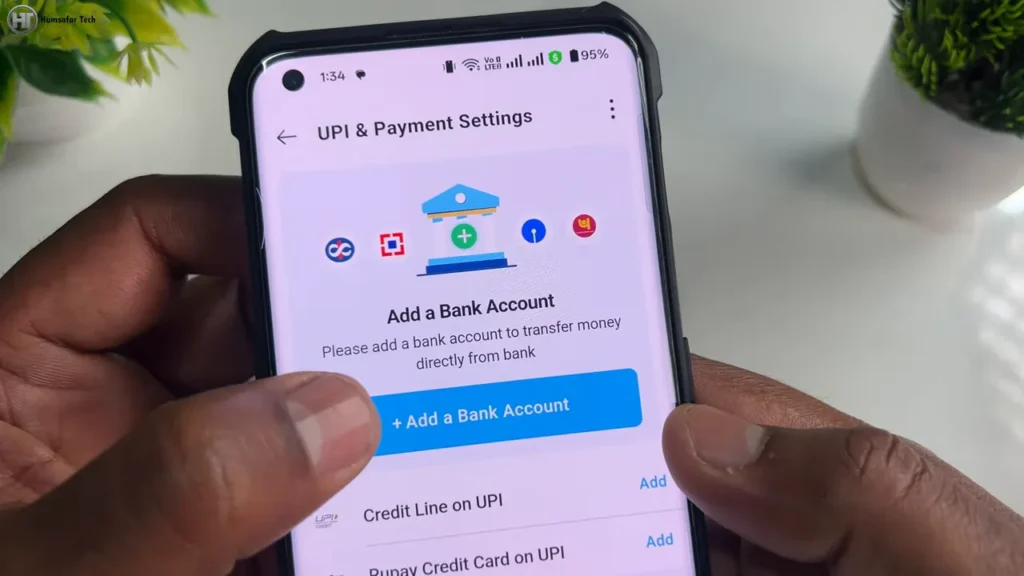
    3. UPI और पेमेंट सेटिंग्स में जाएँ
    नीचे UPI and Payment Settings में जाकर बैंक अकाउंट जोड़ें।

    UPI और पेमेंट सेटिंग्स में जाएँ

    बैंक अकाउंट UPI से लिंक कैसे करें

    UPI लिंक करने के लिए यह आसान प्रोसेस है। आप डेबिट/एटीएम कार्ड या आधार कार्ड दोनों से वेरीफाई कर सकते हैं।

    1. बैंक सिलेक्ट करें
    आपका मोबाइल नंबर जिस बैंक अकाउंट के साथ लिंक है, उस बैंक को सेलेक्ट करें। ऐप आपका बैंक अकाउंट फाइंड कर लेगा।

    2. वेरीफिकेशन मेथड चुनें
    पहला ऑप्शन डेबिट कार्ड (ATM) होता है। अगर आपके पास ATM नहीं है तो आधार कार्ड से भी वेरिफाई कर सकते हैं।

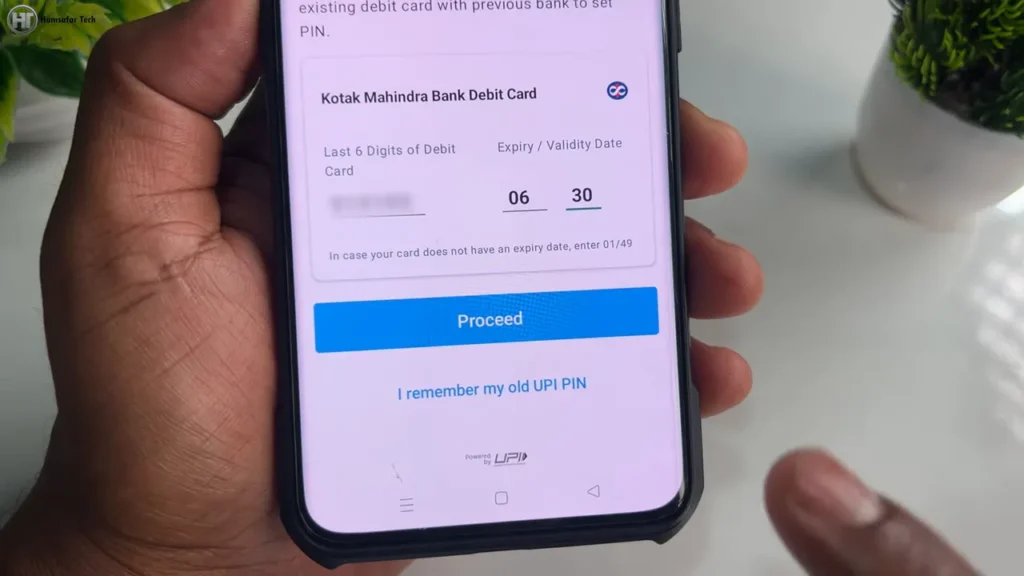
    3. डेबिट कार्ड डिटेल्स डालें
    एटीएम कार्ड के आखिरी 6 नंबर और expiry month/year डालें, फिर Proceed करें।

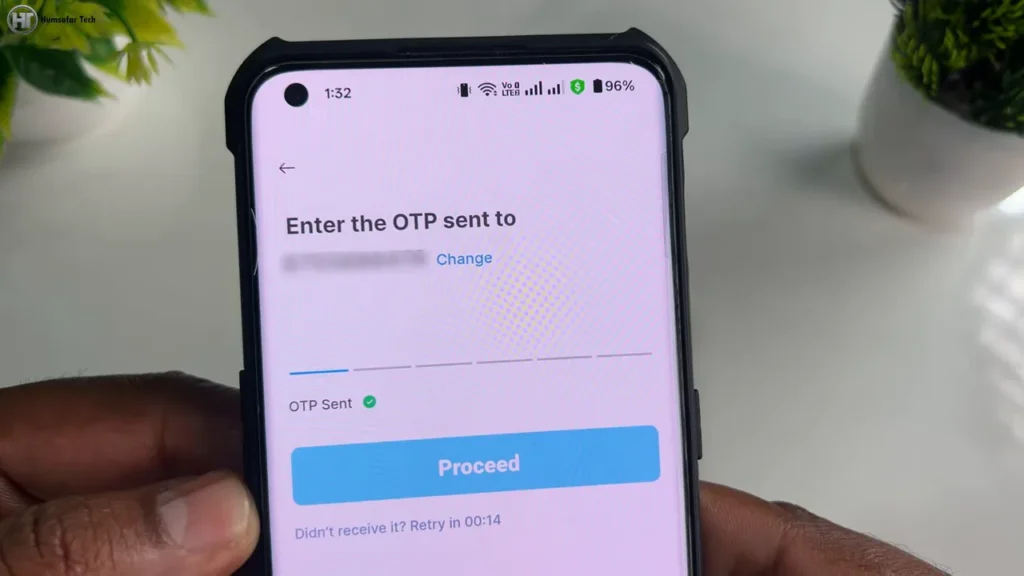
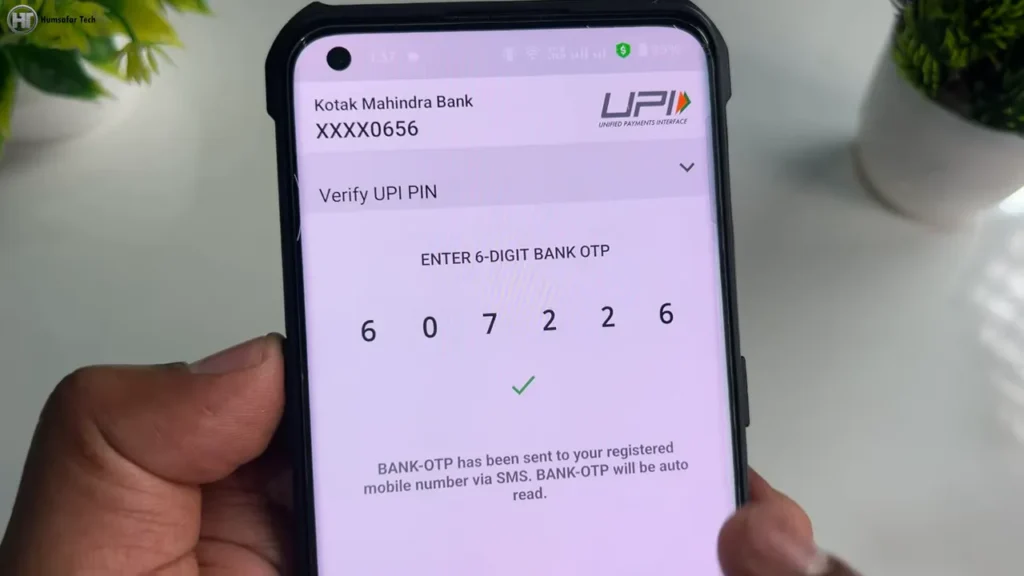
    4. OTP से वेरीफाई करें
    बैंक आपको OTP भेजेगा। ऑटोमेटिक वेरीफाई हो सकता है या आप मैन्युअली OTP एंटर करें।

    OTP से वेरीफाई करें

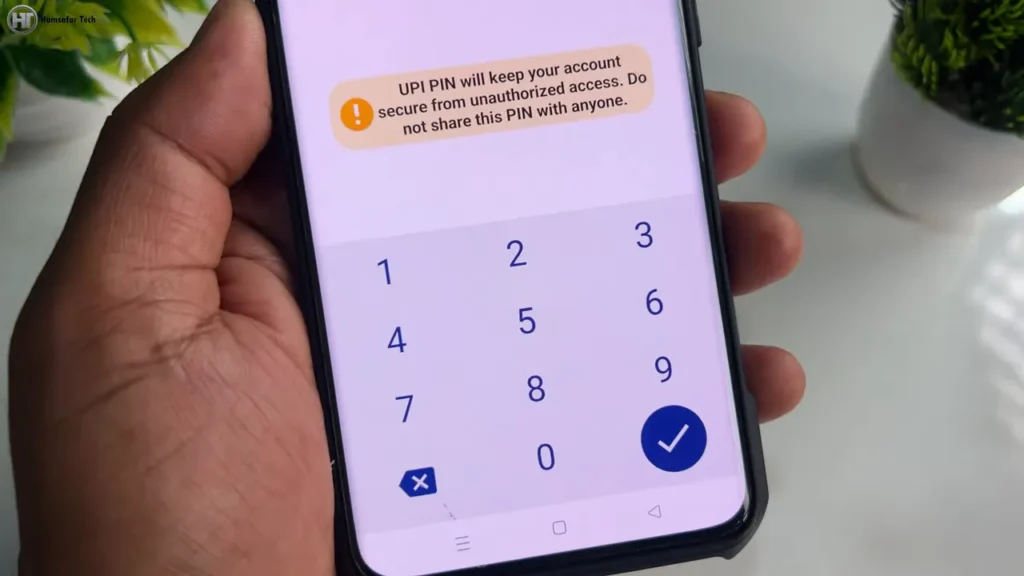
    5. UPI PIN सेट करें
    अब आपको 4 या 6 डिजिट का UPI PIN सेट करना होगा (बैंक पर निर्भर)। PIN बनाकर उसे री-एंटर कर कन्फर्म करें।

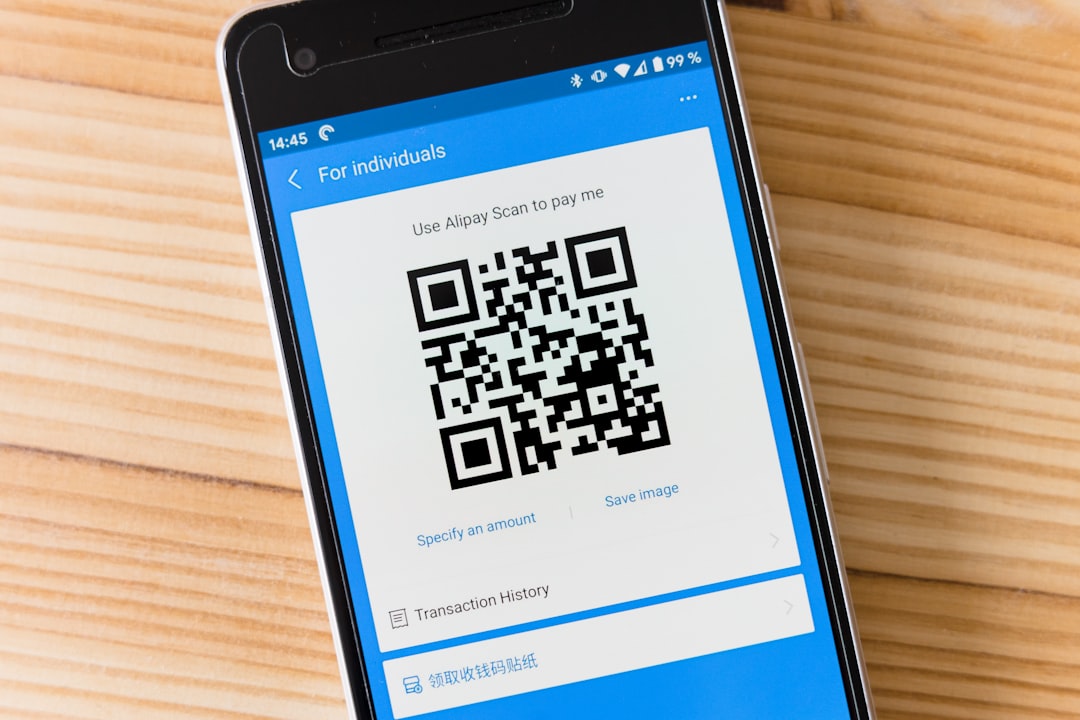
    QR कोड से पेमेंट और पैसा भेजना

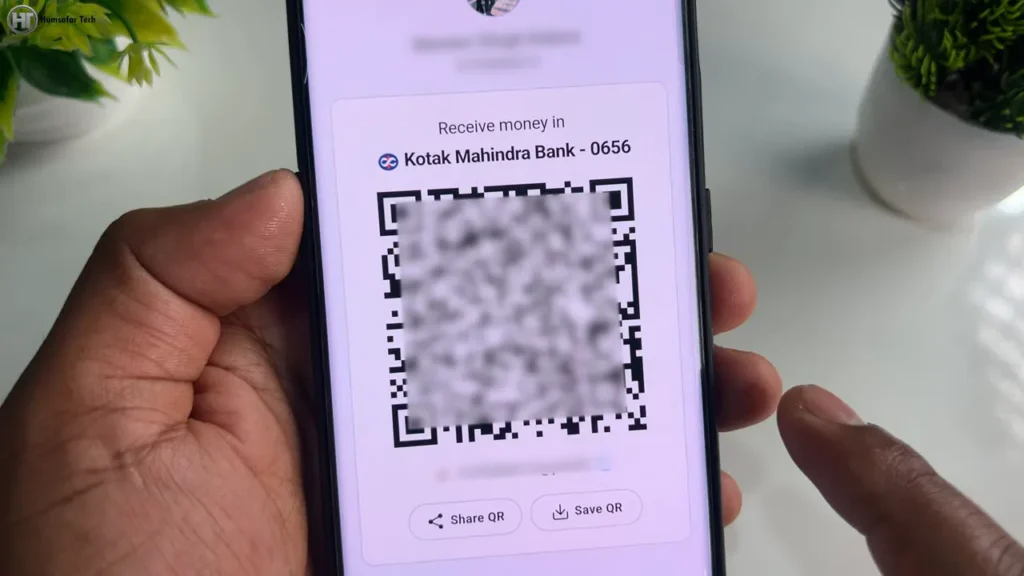
    Paytm में अपना QR कोड शेयर करके या दूसरे का QR स्कैन करके आप तुरंत पैसे भेज या माँग सकते हैं। यह सबसे तेज़ तरीका है छोटी रेमिटेंस के लिए।

    QR कोड से पेमेंट और पैसा भेजना

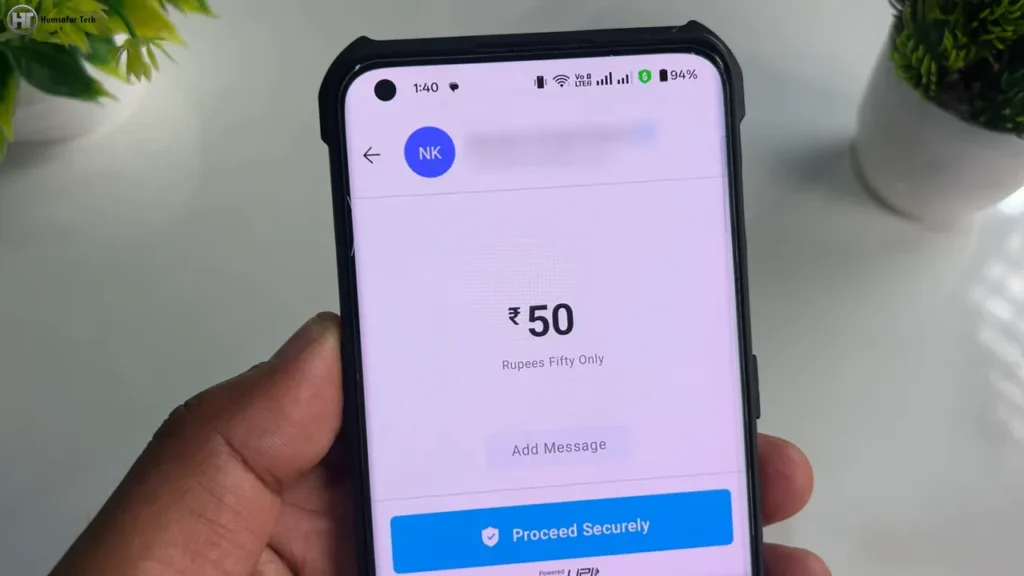
    QR स्कैन करके पेमेंट करने का तरीका:

    1. QR स्कैन करें और अमाउंट डालें (उदाहरण के लिए ₹50)।
    2. रिज़न लिखें या छोड़ दें, Proceed पर टैप करें।
    3. UPI PIN एंटर करें और Payment को Complete करें।

    पेमेंट सफल होने पर ट्रांजेक्शन कम्प्लीट का मैसेज दिखेगा। आप मोबाइल नंबर, बैंक अकाउंट या UPI ID तीनों पर पैसे भेज सकते हैं।

    बैलेंस और ट्रांजेक्शन हिस्ट्री कैसे चेक करें

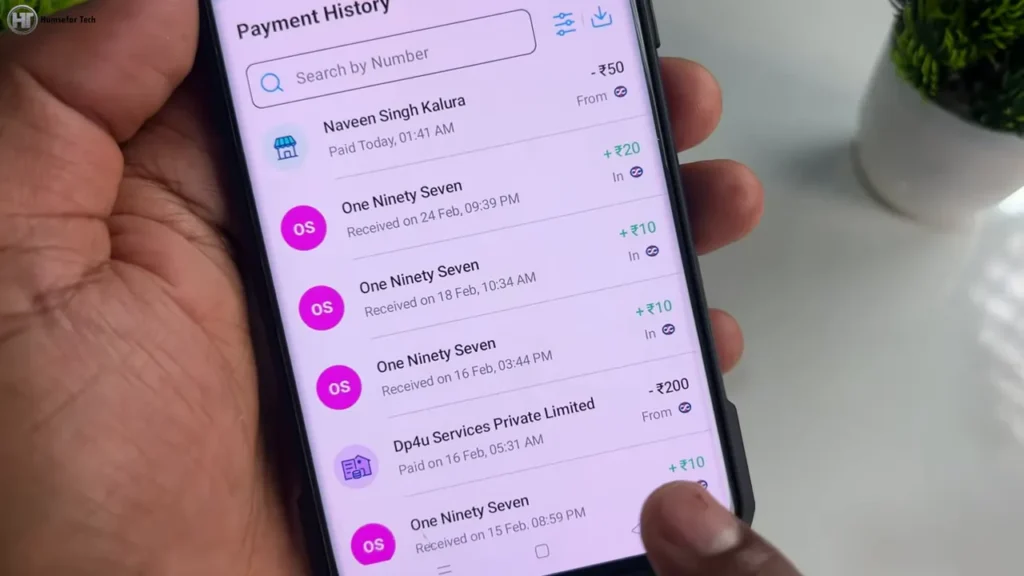
    अगर आप चेक बैलेंस और हिस्ट्री पर क्लिक करेंगे तो पूरा ट्रांजेक्शन लॉग दिखेगा कि कितना पैसा आया और कितना गया। इससे आप अपने रिकार्ड और कैशबैक को ट्रैक कर सकते हैं।

    बैलेंस और ट्रांजेक्शन हिस्ट्री कैसे चेक करें

    अन्य सुविधाएँ

    • Mobile recharge
    • Electricity bill, Water bill भुगतान
    • QR कोड शेयर और डाउनलोड
    • UPI ID और कस्टमाइज़्ड QR

    अक्सर पूछे जाने वाले प्रश्न (FAQ)

    क्या मैं बिना ATM कार्ड के Paytm UPI लिंक कर सकता हूँ?

    हाँ। अगर आपके पास ATM कार्ड नहीं है तो आप आधार कार्ड का उपयोग करके भी बैंक अकाउंट वेरीफाई कर सकते हैं।

    UPI PIN कितने अंक का होता है?

    UPI PIN 4 या 6 अंकों का हो सकता है, यह आपके बैंक पर निर्भर करता है।

    क्या Paytm से पैसे ट्रांसफर करना सुरक्षित है?

    सुरक्षा के लिए हमेशा अपना UPI PIN और बैंक OTP शेयर न करें। आधिकारिक Paytm ऐप और सीधे बैंक वेरिफिकेशन चैनल ही इस्तेमाल करें।

    नोट और सुझाव

    • मोबाइल नंबर और बैंक डिटेल्स सही रखें ताकि ऑटो वेरीफिकेशन smoothly हो।
    • OTP और PIN को कभी साझा न करें।
    • रेफ़रल और गेमिंग ऑफर्स के नियम पढ़ें ताकि अनुमानित रिवॉर्ड और शर्तें समझ में आएँ।

    इन स्टेप्स को फॉलो करके आप आसानी से Paytm अकाउंट बना सकते हैं, बैंक लिंक कर सकते हैं और QR/UPI के जरिए भुगतान शुरू कर सकते हैं। साथ ही रेफ़रल और इन-बिल्ट ऑफर्स से आप कुछ अतिरिक्त आय भी कमा सकते हैं।

  • Google My Business : Tips & Tricks

    Google My Business : Tips & Tricks

    If you run a local business and want more customers from Google, this guide is for you. I will walk you through everything you need to set up, optimise and manage your Google My Business (GMB) profile so your business shows up in local searches, maps and gets real customers calling, visiting or booking.

    Why local search matters

    • Nearly half of all Google searches are local searches. People look for businesses near them.
    • Most customers discover local businesses online. If your listing is poor or incomplete, you miss leads.
    • Mobile searches are critical: many mobile searchers contact a business after searching.

    Is Google My Business right for your business?

    GMB is made for businesses that have a physical location customers can visit or that serve customers in a defined local area (for example a repair service visiting homes). If you sell only online without a local presence, GMB may not be necessary.

    How to create and claim your Google My Business listing

    1. Create or use a Google account you control. This will be the owner account for the listing.
    2. Go to the official Google Business page and click “Sign in” or “Manage now.”
    3. Enter your business name. If the listing exists, claim it instead of creating a duplicate.
    4. Choose the most accurate category (primary category) — this affects how Google shows your listing.
    5. Add a precise address if customers can visit. Drop the pin on the map for accuracy.
    6. If you serve customers at their locations (service area business), set the service area and do not show a public address if you don’t have a storefront.
    7. Enter contact details: phone number, website URL (if you have one), and other important information.
    8. Verify your listing by the method Google provides (usually postcard, phone or email). Do not skip verification.

    Business profile: fields to fill and why none should be blank

    Google relies on the info you give. The more accurate and complete it is, the better your chances of ranking for local results.

    • Business name: Use your official brand name. Do not add keywords or locations to the name unless those are part of the real legal name.
    • Primary and additional categories: Select the best primary category and add secondary categories if needed (up to allowed limits).
    • Address and pin: Exact address and pin help Google show you in maps and local packs.
    • Service area: If you travel to customers, set the areas you serve.
    • Business hours and special hours: Set regular hours and add holiday/special hours when needed.
    • Phone and website: Use a main phone number. You can add secondary numbers. Website helps conversion — even a simple landing page is better than none.
    • Attributes: Attributes such as “online appointments”, “wheelchair accessible”, or COVID precautions help customers choose you.

    Write a perfect business description

    You get a description field and a shorter snippet that often appears in search results. The first 250 characters are very important — they appear in many views.

    • Start with the most important information: who you are, what you offer, and your location.
    • Use simple, customer-focused language. Avoid all-caps, excessive punctuation, or promotional phrases like “50% off” in the description field.
    • Create templates if you manage multiple clients — keep them editable so you can customise for each business.
    • Update your description when your services or focus change. Recent updates can take a few days to reflect.

    Services and categories: how to list what you do

    The Services section allows you to list detailed services and prices or starting prices. Use it:

    • Add service names and short descriptions so customers see exactly what you offer.
    • If you have many services, organise them and use clear naming (for example “Web Design” instead of vague terms).
    • Choose categories carefully — Google uses categories heavily for matching queries to listings.

    Store code, labels and multiple locations

    If you manage multiple branches you will need:

    • Separate listings for each location — Google treats each physical location as a distinct listing.
    • Unique addresses for each listing. Names should remain consistent but addresses and pin locations must be different.
    • Store code and labels to segment and tag locations for reporting and management.
    • Avoid duplicating listings for the same exact location. Duplicate or incorrect multiple listings can cause suspension.

    Photos: what to upload and best practices

    Photos are powerful. They help customers understand your place and products and Google uses image activity as a ranking factor.

    • Upload high-quality, natural photos of interior, exterior, products, team and service delivery.
    • Do not use unrelated or heavily edited promotional images — keep photos realistic.
    • Encourage customers to post photos too. Customer photos increase trust and the number of images you show in search results.
    • Regularly add new photos. Quantity helps, but quality and relevance matter more than just a big number.

    Reviews: why they matter and how to manage them

    Reviews influence both customer decisions and Google rankings. They contribute to your prominence and trustworthiness.

    • Positive reviews increase conversions. People read reviews before choosing a business.
    • Quality and recency matter — recent, detailed reviews are more valuable than many old or poor-quality ones.
    • Respond to reviews promptly. For positive reviews, thank the customer and personalise your reply. For negative reviews, respond professionally, acknowledge the issue, and offer to resolve it offline.
    • Do not attempt to fake reviews or post reviews from competitors. This can lead to penalties and suspension.

    How to generate a review link

    1. Go to your GMB profile and find the section to get a “review short link.”
    2. Copy the link and use it in emails, SMS, website buttons or social media to make it easy for customers to leave reviews.

    Flagging inappropriate reviews

    If a review violates Google policies (spam, hate speech, conflicts of interest, personal attacks), flag it:

    • Open the review and choose “Flag as inappropriate.”
    • Follow Google’s process. You can request removal, but Google will only remove reviews that genuinely violate policy.
    • Document evidence if the review is fraudulent. This helps in appeals or support tickets.

    Social links and other listing fields

    Add links to your social profiles if relevant. Also populate other fields like services, products, and appointment URLs so customers have multiple ways to contact or book with you.

    Insights: what to track and how to use them

    GMB provides useful insights to understand customer behaviour:

    • Queries: What people searched to find your listing — helps you match content and keywords.
    • Customer actions: Calls, website clicks, direction requests and bookings.
    • Direction requests: Map pins showing where users who requested directions are located. Zoom to see which pin codes generate the most requests.
    • Phone calls: See call volume and times to staff appropriately.
    • Photo views and quantity: Compare how your photos perform against competitors in your category and location.

    Posts, events and offers: how to use them

    Use posts to share updates, events, offers, and calls to action. These appear in your business listing and help with engagement.

    • Create “What’s New” posts for updates and announcements.
    • Use Event posts with dates and booking links if you’re hosting workshops or workshops.
    • Use Offer posts to promote discounts and add coupon codes, terms and expiry dates.
    • Keep posts fresh and consistent. Regular posting improves visibility.

    Ads and Smart Campaigns

    If you want to promote faster, use Google Ads Smart Campaigns tied to your business profile. Smart Campaigns help you get more calls, website visits or in-store visits. Set a daily budget and target area carefully.

    Citations vs Backlinks: what they are and why both matter

    Citations are online references to your business name, address and phone number (NAP) on directories and other websites. Backlinks are links pointing to your website. Both increase trust but serve different roles:

    • Citations strengthen the local visibility of your business and confirm NAP consistency across the web.
    • Backlinks increase website authority and help organic search rankings.
    • A citation is not the same as a backlink. Citations do not always include links but help local relevance and trust.

    How to audit citations

    1. Create a spreadsheet with columns: business name, address, city, state, zip code, phone number, website, listing URL, notes.
    2. List all major directories where your business appears (Justdial, industry directories, local chambers, etc.).
    3. Check each listing for NAP consistency and completeness. Correct mismatches immediately.
    4. Prioritise fixing high-authority directories first and then move to smaller sites.
    5. Where possible, claim unclaimed listings and update details.

    How to find citation opportunities

    • Search competitors’ listings and note directories that mention them but not you.
    • Use local business directories, niche directories for your industry, local chamber of commerce, and review sites.
    • Look for platforms where customers search for your service (e.g., health platforms for clinics).

    Multiple locations: rules and best practices

    • Create one listing per physical location with unique, accurate address and pin.
    • Use the same brand name across listings. Do not add keyword stuffing or city names to the business name.
    • Phone numbers: ideally a central phone number can be used, but unique local numbers are acceptable as secondary numbers. Avoid creating duplicate listings for the same place.
    • Manage labels and store codes to organise multiple locations.

    Settings, users and access control

    You can add users with different roles. Choose access carefully:

    • Primary owner: Full control; there can be one primary owner who cannot be removed by others.
    • Owner: Full control similar to primary owner but cannot remove the primary owner.
    • Manager: Can edit business info, create posts and respond to reviews but cannot remove users or transfer ownership.
    • Only give owner level access to trusted, permanent team members. Use manager access for daily operators or interns.

    Reasons for suspension and how to avoid them

    Your listing can be suspended for many reasons. Key prevention tips:

    • Avoid duplicate listings for the same business address.
    • Do not add misleading business names or keyword stuffing to your name.
    • Follow Google content policies for reviews. Do not post fake reviews or ask staff to post false reviews.
    • Keep NAP consistent across all directories and your website.
    • When making major changes (name, address, phone), proceed carefully and document proof of business ownership if Google asks.

    Checklist to optimise your GMB profile

    1. Claim and verify your listing.
    2. Complete every field: name, address, phone, website, categories, services, attributes.
    3. Write a strong description, placing the most important info in the first 250 characters.
    4. Upload high-quality photos and keep adding new ones regularly.
    5. Encourage and respond to reviews professionally.
    6. Create posts consistently: news, events, offers.
    7. Monitor Insights and adapt hours, staffing and campaigns based on data.
    8. Run citation audit and fix inconsistencies across directories.

    Short name and review collection tools

    Create a GMB short name to make it easy for customers to find your profile. Use the review short link to ask customers for reviews via email, SMS or website buttons.

    Website from GMB

    If you do not have a website, GMB offers a basic website builder that pulls information from your listing. It is a quick solution for small businesses, but a dedicated website is better for long-term SEO.

    Final tips — practical and easy

    • Never leave optional fields blank. Fill everything accurately.
    • Be consistent with your NAP everywhere on the internet.
    • Respond to every review — thank positives and resolve negatives professionally.
    • Use photos, posts and offers to keep your listing active and interesting.
    • Use insights data to understand where customers come from and when they call. This helps you make better ad and local marketing decisions.

    Conclusion

    Google My Business is one of the most powerful free tools for local businesses. A well-optimised listing improves visibility, builds trust, and drives real customer actions like calls, visits and bookings. Follow this guide to set up, optimise and maintain your GMB profile, and treat it as an ongoing channel — update it, monitor results, and keep improving.

    Get started today: claim your listing, verify it, fill every field, upload real photos, get reviews and track your results. Consistency and accuracy win in local search.